Let's be clear, I know nothing at all

"You Will Never Walk Alone"
Showing posts with label Vacuum Truck.. Show all posts

Thursday

NON DESTRUCTIVE DIGGING AND EXCAVATION REPAIRS AND FABRICATION.

Here is the Acco 2350G Vacuum Sucker Truck used for the Project.

We start off with this truck recovered from a roll-over. It was a sewer vacuum truck in it's early days. The damaged vacuum tank has been removed and the repairs have begun.


We turn this truck above into the truck seen below.


First we remove the transmission and replace the damaged bell-housing, at the same time we fit a new clutch and check the flywheel for run-out. The photo below shows the bell-housing truly destroyed in the roll-over.


Next we remove all the damaged and destroyed ancillary items, the separator, vacuum pump unit, water cooling system and air tanks.


The vacuum tank is repaired. Legs are welded onto the sides of the tank to support the new larger and improved water tanks. Sandblasted and painted she looks the picture. 

In this photo the tank on our tilt tray ready to be mounted onto the Acco.


Tank fitted to the Acco truck, The project is starting to take shape.


Next comes the new water tanks, fitted to the left and right hand side of the vacuum tank.


Now is the time to start repairing all the ancillary items that got damaged in the accident.
Shall we start with the battery box!


A new vacuum pump coolant tank and oil reservoir tank are purchased. These have to be modified to take on there new work role.


Here the coolant tank is fitted to the chassis, provision is made to fit a n electric fan in the future should the vacuum pump generate to much heat.


The oil reservoir is mounted behind the diesel tank and an eye glass fitted to observe the oil level, very critical to the longevity of the vacuum pump.


Next we build a new scrubber tank, the black cylindrical drum on the left bottom of the photo, and mount it. The vacuum pump is mounted on a new platform and new drive shafts are fabricated. Here Nathan is fitting new vac hoses and fastening up the clamps.


What we need now is a high pressure / high volume water pump. 

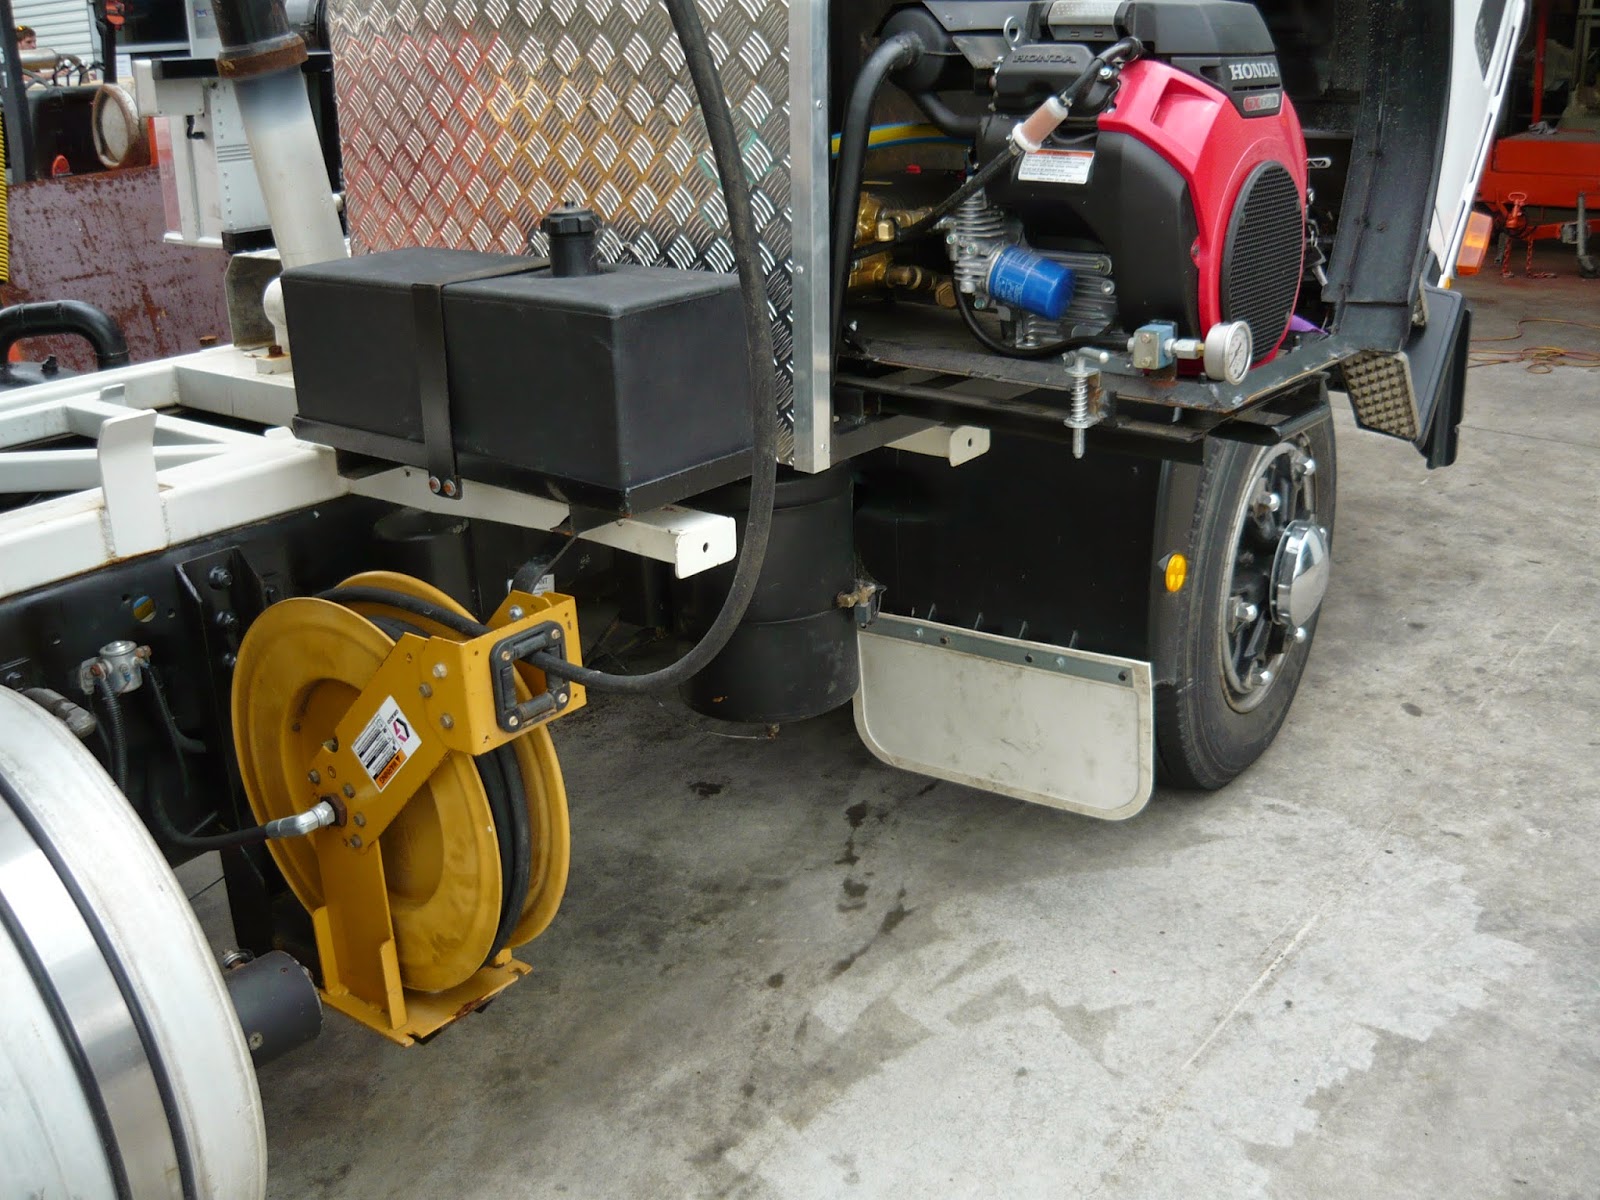
This Honda set up will do just right.


We need to fit an idle-up solenoid to the new engine for on-demand pressure. this was a bit fiddly, worked a teat though!


Fabricate a box with a sliding bottom so that the engine and pump could be service and maintained with ease was the next 


After plumbing up the supply water and running it through a filter it is time to start on the high pressure side of things.

We fit a retractable heavy duty hose reel that can cope with the flow and pressure we are going to use when we non-destructive dig.


To control and monitor this piece of equipment we need a great control panel. This we fabricate in-house and wire up to incorporate the following features.
1) Emergency shut-off system for the truck engine.
2) Emergency shut-off system on the high pressure water pump.
3) Emergency shut-off system on the vacuum system.
4) Low water shut-down to protect the high pressure water pump.
5) Warning light for Low water
                              P.T.O. Engaged.
                              Ladder up.
                              Coolant pump On.
                              Idle -up for the truck engine.
                              Idle-up for the water pump motor.
6) Vacuum ON_OFF
7) Work lights.
8) Truck engine idle-up > to 1500 rpm.


To keep the Masport Vacuum pump running at the correct rpm we fitted an electric idle-up solenoid to the Cummins engine fuel distributor pump. In the photo it is pinched between the yellow hose clamp blocks.


After mush checking and testing we are ready to see how this whole system preforms. We hook up a vacuum gauge to the main suction port and run the machine up to pressure.

Not bad for a vacuum pump that size and the gauge reads 9' of mercury.


Below are a few photo's of the completed non-destructive truck and set-up.


Enquiries regarding this type of repair are welcome.

Call or text Charlie on 0403 861 597

You are also welcome to contact us on the form below.                           

Tuesday

MASPORT VACUUM PUMP REBUILD

MASPORT VACUUM PUMP REBUILD

We repaired this MASPORT H15W vacuum pump. It was part of a Non-destructive digging plant.
As we had no idea of the condition of this vacuum pump, it was removed from the truck and stripped down.
These are very simple machines in theory, but in practice they require a lot more attention that most imagine.
After a good hot wash and chemical clean we could get to work.
Clearances are of the utmost importance, and any deviation can cause untold problems.
So out came the measuring tools and the results were compared with the manufactures specs.


Here is a handy check-list to guide you.


The belt driven Masport vacuum pump.

It soon became evident that this vacuum pump was in serious trouble.
As can be seen in the photos below, the housing had worn badly.
The corrugated finish or surface inside the housing was affecting the performance of this vacuum pump.
This was most probably the result of running the pump at to-low a speed, causing the vanes to chatter.
This chatter in turn wears out the housing, giving it a wave like finish.

Corrugated wear pattern

This housing still with-in spec, so she was machined and honed, ready for a new life.

The end plates or covers were also inspected for wear.
Contamination is also a big enemy to these vacuum pumps.
Poorly filtered air carries dirt and grit that gets lodged between the rotor and end plates.

Notice the vane's, 4 of them, they to are prone to a lot of wear and tear.
They have to be replaced or machined before assembling the pump again.

These end covers are still fine.

No signs of wear, no groves or scratches, no rough patches that would make a poor vacuum seal.


The rotor and shaft were also given a good once over.
The shaft was checked for run-out.
The rotor also checked for run-out, but at the same time the clearance between the vane and the rotor grove were checked.

Everything was in spec; only the bearings were in poor condition, so they were replaced.

Critical to performance is the end float and clearance between the rotor and end plates.
After much set-up, we were happy, and assembly began.


Diagram of all the parts.


After assembly the pump was ready to be fitted to the new mounting plate and stand.
This we fabricated from scratch as the last one was destroyed.
New pillar bearings were also fitted and everything was lined up.

Another great killer to these pumps is the lack of lubrication.
Fitted with an oil dosing pump that is pulsed by the rotor shaft, the correct grade and flow of lubricant is vital.
No oil means the vane build up excessive friction, that causes heat and in turn that bring home failure.


Here the pump and stand is in the process of being fitted to the Non-Destructive Digging plant \ truck.


Nathan , my favorite son, fitting the vacuum pump and stand to the truck.
This oil tank was fitted to provide lubricant for the vacuum pump.
Sight line or glass was important, not good idea to run out off oil in the middle of a job!

All plumbed up! Notice the sight glass on the coolant tank, the big shiny ally tank on the right.
An electric Dave y pump circulates the coolant between the tank and the Masport vacuum pump.

Ready to GO!!!!!

First run, 9.2 inches if mercury on the test gauge.  All good.


With all the lubrication lines hooked us, a new radiator cooler fitter along with a 60l coolant tank filled with All-Cool

We were ready to make some vacuum.

Visit the official MASPORT site here
http://www.masportpump.com/


Enquiries regarding this type of repair are welcome.

Call or text Charlie on 0403 861 597

You are also welcome to contact us on the form below.