Let's be clear, I know nothing at all
"You Will Never Walk Alone"
Wednesday
Saturday
Sprinter - YouTube Tutorials
Find more Technical Sprinter Information at the link below.
SPRINTER VAN - RESOURCE PAGE - PDF
2015 Sprinter rear door lock
All about sprinter door locks
Tips on Mercedes Sprinter Door Handle Removal | Mercedes Sprinter DIY
2002-2006 T1N Sprinter Slider Door Repair
Sprinter Sliding Door Handle Replacement
Mercedes-Benz Sprinter (1995–2006) door panel removal
Wednesday
DTC - P0125: Insufficient Coolant Temperature for Closed Loop Fuel Control
P0125 FAULT CODE
Here's a flotilla of suggestions to solve this code.
Basic 101.
- Check the coolant level.
- Check the temperature sensor.
- Check the thermostat
- Check the temperature sensor wiring from sensor to ECU.
FROM ARROUND OUR GLOBAL VILLAGE - WORDS OF WISDOM
How to Fix P0125 Engine Code in 3 Minutes
Mitsubishi Pajero with fault code P0125
How to Test and Replace an Engine Coolant Temperature Sensor P0115 / P0125
P0125 P0128 Insufficient Coolant Temp: Thermostat Housing Replacement
DIAGNOSIS PROCEDURE- (CLICK ON IMAGE BELOW)
Monday
ASV RC50 - Bucket Cradle + Cylinder Pins and Bushes.
PHASE TWO - Replace pins and bushes.
This is the bucket cradle - all the bushes worn out and pins shot.
We machined new bushes to suit - bored them to size and welded into place.
Bushes welded into place and then reamed to suit the new pins.
Pins slide into new bushes, all ready for assembly.
Like Hannibal says " I love it when a plan comes together."
Now we start on the worn out bucket cylinder rams.
Both side are worn beyond repair.
And so we have a plan.
for the rod ends we will fabricate new bushes and weld them onto the rods
after removing the old ones.
Easy said! Of course.!!
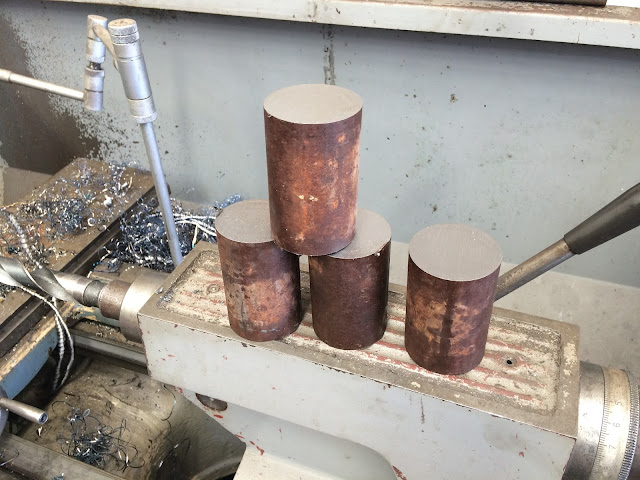
4 x round bar ready to be machined on the lathe.
Ready to be welded onto the rod ends.
Next we execute the old rod bushes - leaving the rod only.
We prep the steel for a low hydrogen weld and coat the rod with anti-splatter.
The executed rod end and the cylinder ends.
A patient weld - and the rod end bush is mated to the rod.
Next is the cylinder ends on the bucket cylinders.
Here the plan was to machine the worn-out hole larger and press fit a new bush into place.
Worked like a dream.
New bush - New pin.
For the load arm cradle cylinder ends we had a challange.
They wee so worn that there was not enough meat to machine a bore for a new bush.
So after execuing the cylinder ends we came up with this plan.
Two eyes were machined on either end of a lenght of flat bar.
These were then machined off and welded to the cylinders.
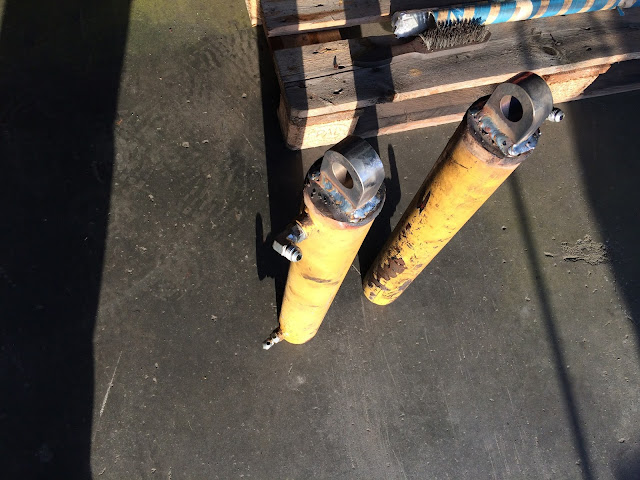
The machined eye - ready to be welded to the cylinder.
Job done! Eye welded into place.
Only thing left is to hone the cylinders before assembly + fit new seals.
All assembled and back on the machine.
Ready for the next few years of hard work.
Top-end of the bucket cylinders.
Bucket cradle all assembled and in place.
Saturday
You'll never walk alone
When you walk
through a storm
Hold your head up high
And don't be afraid of the dark
At the end of a
storm
There's a golden sky
And the sweet silver song of a lark
Walk on through the
wind
Walk on through the rain
Though your dreams be tossed and blown
Walk on, walk on
With hope in your heart
And you'll never walk alone
You'll never walk
alone
Walk on, walk on
With hope in your heart
And you'll never walk alone
You'll never walk alone!
An Absolute Truth Buddy.
Wednesday
SPRINTER VAN - RESOURCE PAGE - PDF
Sprinter Van Service and Technical Guides.
- AdBlue - BlueTEC - Mercedes Benz Official Explanation.
- ATF Fluid Level - Automatic Transmission Fluid Level Explained.
- Aux Battery Retrofit Guideline ( MY ‘07 – ‘13)
- Auxiliary Battery with Isolation Relay Install.
- Auxiliary Diesel Fuel Tap
- DTC - Diagnostic Trouble Codes - Sprinter 2018
- DTC - Merc Table.
- Diesel Fuel 101
- DIESEL FUEL LUBRICITY ADDITIVES STUDY RESULTS
- Diff Fluid Change Procedure.
- Door trim Removal - 2006 VA Manual
- Door - Sliding Door Adjustment.
- Disabling the Radio Frequency Code (RKE)
- Fuel Filter PDF - Filter change and wiring
- Fuel Pump Repriming
- Fuse Panel Layout - 2005
- Fuse Layout Mercedes-Benz Sprinter ( 906 ) 2006-2018
- Fuse and Relay ( 907 + 910 ) Sprinter Van
- Facebook Sprinter Manual
- FAQ - Sprinter
- Paint Codes - Genuine Numbers
- Parts Manual - 2002 VA
- Parts Manual - 2003 VA
- Parts Manual - 2004 VA
- Parts Manual - 2005 VA
- Parts Manual - 2006 VA
- Parts Manual - 2007 VB
- Parts Manual - 2008 VB
- Power Train - 2004 VA
- Switch Table - Images and explanation.
- Service + Repair Manual 2005 VA - 1232 pages
- Service Manual - 2004 VA
- Service Manual - 207D 307D 210D 410D 208D 308D 310D 408D
- Sliding Door Adjustment.
- Side Window Removal and Installation
- Swivel Seat Mounts - Installation.
- Shiftmatic Gearbox 0B81
- SKREEM Immobilizer Module Removal2002-2006
- Spare Wheel System
- Transmission Manual - 2004 VA
- Transmission - 7G-Tronic Transmissions
- Transmission - Mercedes 722.6 Series
- Transmission - Shiftmatic Gearbox 0B81
- Technical - Electrical - Overview - 2000 - 2010
- Turbo Removal
---------------------------------------------------------------------------------------------------
Sprinter Van YouTube Tutorials.
-----------------------------------------------------------------------------------------------------------------
Saturday
ASV RC50 - Pins and Bushes on the Cradle Arms.
RC 50 ASV Skid Steer Loader has a very worn set of pins and bushes.
This week starts off with removing the cradle and replacing all the pins and bushes.
Here is a clip of the free play between the pins cradle bushes.
Check the slop in these bushes.
The RC50 has had the bucket arms and cylinders removed -
Ready to remove the loader cradle.
And off come the cradle - now we inspect the damage.
Many years of hard work and abuse and this pin is worn-out.
Chech the wear in the bush - more than egg shaped.
The hydraulic ram is not much better - here the eye has retired.
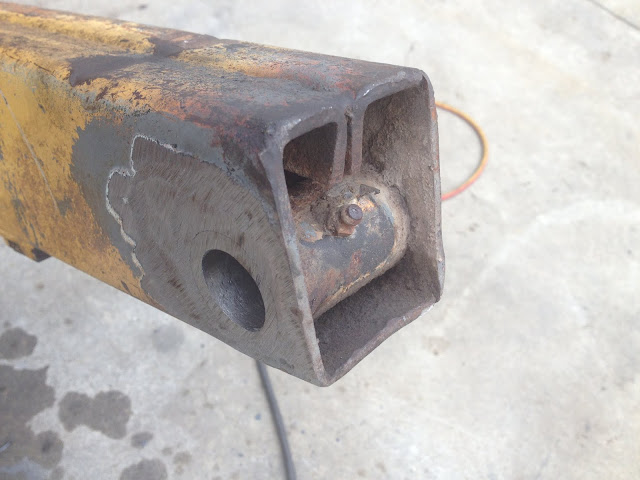
We start removing the old bushes by grinding away all the welding with the trusty 9"
A little more tricky this one - Not at all , just a mild challenge.
Notice the internal webbing, welded to the bush!
How do we tackle this?
Now the web is free from the bush!
Next we drive out the old bush -
Ready to accept the new Terex bush.
This is the genuine bushes supplied by the manufacturer.
Slid into place and ready for the weld.
Great fit Buddy!
And so the welding begins, the fun part.
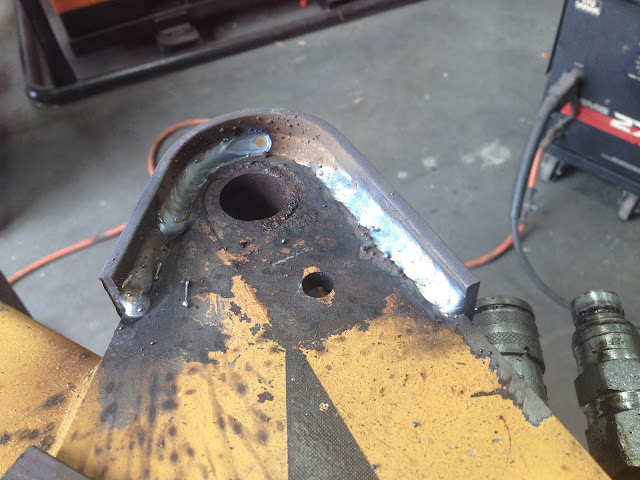
We have folded a flat bar around the front of the arm and welded it up
in a bid to strengthen and support the bushes.
Worked like a dream.
Cradle bushes welded into place.
End Side of the cradle, capped off to strengthen the arm.
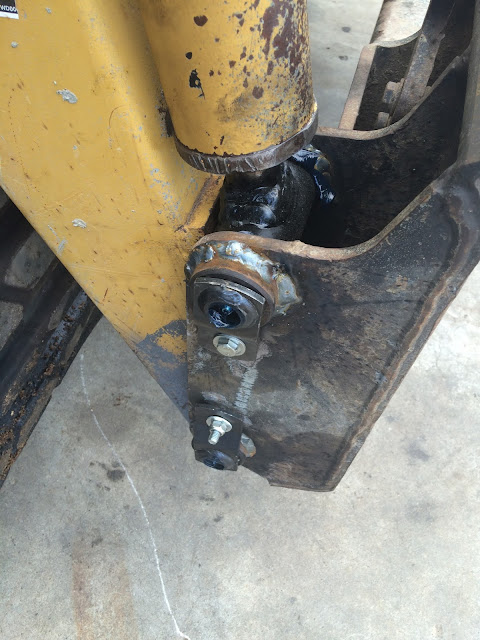
This is what the job looked like after assembly.
The top view of the bucket bushes and the shiny part is the new perches made for the cylinders.
Read bbout this watr of the job in the next post.
Subscribe to:
Comments (Atom)


.png)






.png)


