Let's be clear, I know nothing at all

"You Will Never Walk Alone"
Showing posts with label Caterpillar C12. Show all posts

Monday

Kenworth Engine Replacement - C12 - Hallam Truck Center.

September 2005 while working at Hallam Truck Center as the workshop supervisor I took a day off my usual routine and joined the men on the workshop floor replacing an engine in a Kenworth.

At hand was Geezer, the older block of a chap and two apprentices Tom and Aaron.
Together we tackled the engine change-over and some 16 hours later the truck was back on the road.

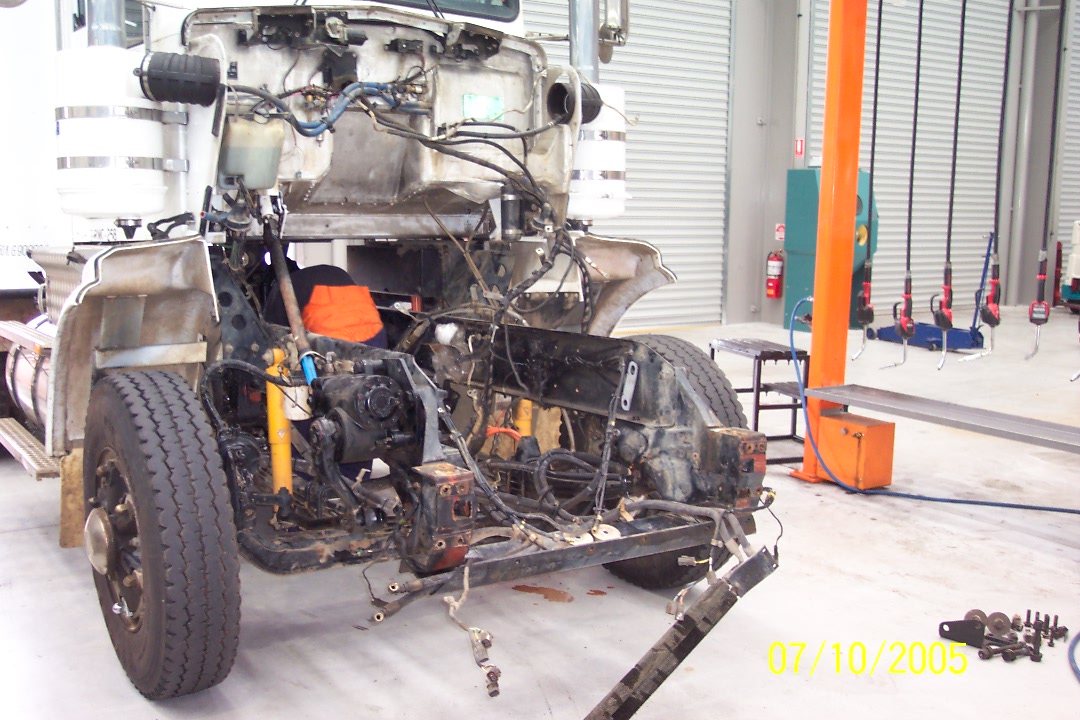
Here are some photos of our fun filled day.


Engine out, now the fun begins.


Remove all the ancillaries, ECU and controls.
Removed the cylinder head to allow the customer to see where his money was going.


New caterpillar engine arrives, fresh out of a crate.

Getting ready to mate the engine to the transmission and fit both together.


No rest for the witched.

Engine and transmission mated together.

Geezer and myself making final adjustments before the engine and transmission go back into the truck.


That night at about 11:30 pm the truck was ready for a test drive.
Aaron was the designated driver and off we sped into the rain.
Our boss had stayed behind for the evening for moral support / crack the whip.

I could not resist the urge after a long day to have some fun and so after a great amount of begging Aaron agreed on the plan.

We parked the truck outside the Truck Center and walked back in the rain.
Pretending to be absolutely motherless we kept quite while everyone asked what has happened.
Eventually Aaron announced that the engine had blown up and we need to organize a tow truck.

We both learned quickly that not everyone shares our sense of humor at 12:30 at night.
We started laughing and all of a sudden no one believed us that there was nothing wrong with the truck.
So off Aaron went in the rain and fetched the truck.
Our boss was strawberry red in the face when he saw the truck purr into the workshop.

What can we say "boys will be boys"


Thank guy's  - great day working with your.

 HOME SITE

Saturday

Caterpillar 3406e, C-10, C-12, C-15, C-16 And C-18 Truck Engine Troubleshooting.

CATERPILLAR 3406e, C-10, C-12, C-15, C-16 And C-18 Truck Engine Troubleshooting. 


PLEASE HIT THE POP OUT SYMBOL ON THE  TOP RIGHT 

OF THE IMAGE TO DOWNLOAD OR PRINT THIS SLIDE.


Caterpillar C10 -C12, 3176B, 3406E Engine Wiring Diagram -Schematic - Chart

CATERPILLar C10 -C12, 3176B, 3406E


 Engine Wiring Diagram -Schematic

 Laminated. 


PLEASE HIT THE POP OUT SYMBOL ON THE  TOP RIGHT 

OF THE IMAGE TO DOWNLOAD OR PRINT THIS SLIDE.


Monday

Caterpillar 3176B, C-10, C-12. 3406E Electrical system


Caterpillar On-Highway Truck Electrical System Wiring Schematics.


Please hit the POP OUT SYMBOL on the  TOP RIGHT 

of the IMAGE to DOWNLOAD or PRINT this slide.


Friday

CATERPILLAR C12 CYLINDER HEAD FAILURE.

ROCKER SHAFT FAILURE.

Here we have a fine example of a C12 Caterpillar engine with the terminal rocker shaft illness.
The truck arrived with a noise in the top end, sounded as if the valves needed adjustment.
We ran the engine without the rocker cover to try and isolate the noise.
After checking the valve clearance we noticed there were times when all the settings changed.
Also close examination at the spots where the rocker shaft mates onto the head revealed movement.
In  one of the photos later you can even see the flakes of metal that lay about the head.
Next we removed all the exhaust brakes and exposed the rockers and shafts.
In the photo below you can see the wear that the rocker shaft caused to the head.
This was because the rocket bolts had come loose.
The movement ate the bed of the rocker shaft away.
This had happened to all 3 shaft beds. No repair possible to this head while on the engine.

Wear in the rocker shaft bed, one can see the chatter and movement scars in the bed.

This is the underside of the rocker shaft, see the wear of the rocker bush on this shaft, many miles behind the wheel!


 So here the story starts.
We have removed the radiator assembly and the bonnet to make life easier.
Front timing cover is removed to pick up the timing marks.

Looks like not much work has been done, but those in the know will know.


Camshaft timing gear and balance are lined up before removed can begin.

Camshaft still in the cylinder head.

Nathan removing the camshaft from it's causeway.

And the shaft is out, nice and heavy to!

A trained eye will pick up the metal flakes or filings on the valve cotters and on the head.

Off comes the old cylinder head , note the front timing cover is still in place, that is why the camshaft had to come out.

Close inspection revealed that two of the pots were running hotter and there was a fair amount of diesel leak-down.

The top set of valves in this picture shows that clearly, end cylinder not nearly contaminated.

Another shot of the dreaded rocker-shaft illness.

Block all cleaned up and new cylinder head gasket in place. Notice the cloth in the timing cover, it is there to stop any foreign object from entering the deep dark side of the engine.

Genuine parts fitted only on this girl, remember to check all the protrusion spec's before placing the gasket on the block.

Brand spanking new cylinder head out of the box! Ha realty!


To repair the old cylinder head would have cost more than this Caterpillar genuine change over unit.
Notice the difference?  Beautiful bed and shaft.

Another view , now don't forget to torque it all down properly, yes and always replace all the rocker shaft bolts, they have been up-graded be Caterpillar.

Change over cylinder head with all it's new valves. the face has been cleaned and is ready to meet the block.

Now there is a slab of engineered metal !

With the engine up and running here is Nathan our  quality control inspector checking out how smoothly the Caterpillar C12 engine idles. He has placed a glass of water on the rocker cover while the engine is running. The engine runs so smoothly that there are nearly no waves on the water surface on the glass.
Well done Filli!
Enquiries regarding this type of repair are welcome.

Call or text Charlie on 0403 861 597

You are also welcome to contact us on the form below.